WG Firebox device supports IKEv2 Always On VPN — partly.
With the built‑in Windows IKEv2 client, the Firebox firewall supports Microsoft Always On VPN user tunnels using MS‑CHAPv2 authentication (username and password). This tunnel starts automatically after Windows login.
However, Firebox does not support certificate authentication, which is required for Microsoft Always On VPN device tunnels. See: Always On VPN Device Tunnel Operation and Best Practices
WG also sells the NCP IPSec Mobile VPN Client software, which supports IKEv2 and includes Always On / Pre‑logon options. But it still uses user tunnels with MS‑CHAPv2 (username and password).
Always On VPN (AOVPN) setup is mostly Windows configuration, not Firebox configuration. If you already have a working Firebox IKEv2 VPN setup, you can configure Windows computers to use IKEv2 AOVPN user tunnels with PowerShell or Intune. This guide shows how to do it with PowerShell.
Lab example Environment
- Active Directory domain: kita.local
- Local network: 10.0.1.0/24
Configure Firebox IKEv2 with Windows NPS and AD
Make sure your Firebox IKEv2 VPN works with a Windows NPS RADIUS server and on‑prem Active Directory authentication.
I also recommend disabling MOBIKE on the Firebox. I’ve noticed that if MOBIKE is enabled, the Windows IKEv2 connection becomes too “sticky.” This means that when you switch from an external internet connection back to the internal network, the IKEv2 tunnel stays connected and does not disconnect like it should.
Use an SSH client (Putty) to connect to the Firebox IP on port 4118, and log in with admin credentials.
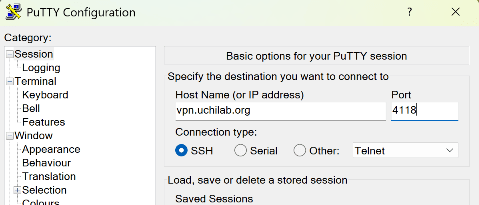
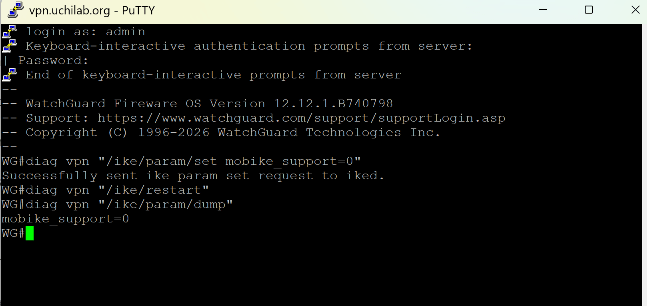
Disable Mobike through the CLI:
diag vpn "/ike/param/set mobike_support=0"
diag vpn "/ike/restart"
Check the MOBIKE status through the CLI.
diag vpn "/ike/param/dump"If the output shows mobike_support=0, then MOBIKE is configured as disabled.
Enable Mobike through the CLI:
diag vpn "/ike/param/set mobike_support=1"
diag vpn "/ike/restart"
On a Windows 11 test machine that already connects successfully to Firebox via IKEv2 and NPS:
Install PowerShell v7 Microsoft guide
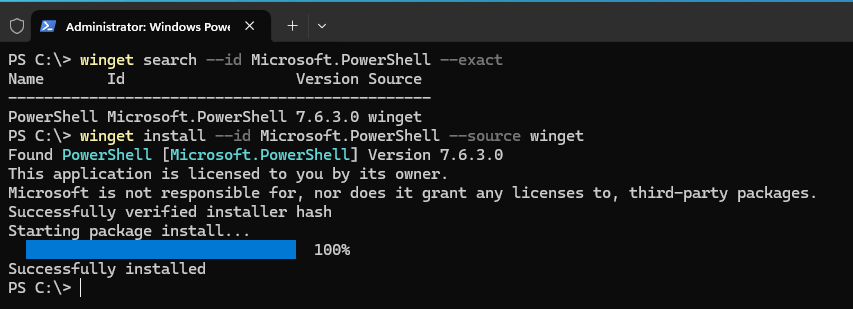
Open PowerShell (Admin) and install AOVPNTools from Richard Hicks Github
Install-Module -Name AOVPNTools -Scope CurrentUser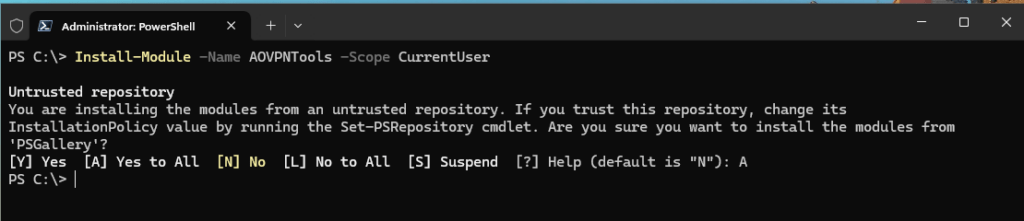
Create a new file called ProfileXML_User.xml and copy the following template into it using Notepad.
<VPNProfile>
   <AlwaysOn>true</AlwaysOn>
   <RememberCredentials>true</RememberCredentials>
   <DnsSuffix>kita.local</DnsSuffix>
   <TrustedNetworkDetection>kita.local</TrustedNetworkDetection>
   <NativeProfile>
      <Servers>vpn.uchilab.org</Servers>
      <RoutingPolicyType>SplitTunnel</RoutingPolicyType>
      <NativeProtocolType>IKEv2</NativeProtocolType>
      <DisableClassBasedDefaultRoute>true</DisableClassBasedDefaultRoute>
      <CryptographySuite>
         <AuthenticationTransformConstants>GCMAES128</AuthenticationTransformConstants>
         <CipherTransformConstants>GCMAES128</CipherTransformConstants>
         <PfsGroup>PFS2048</PfsGroup>
         <DHGroup>Group14</DHGroup>
         <IntegrityCheckMethod>SHA256</IntegrityCheckMethod>
         <EncryptionMethod>AES256</EncryptionMethod>
      </CryptographySuite>
      <Authentication>
         <UserMethod>EAP</UserMethod>
         <Eap>
            <Configuration>
<EapHostConfig xmlns=http://www.microsoft.com/provisioning/EapHostConfig>
   <EapMethod>
      <Type xmlns=http://www.microsoft.com/provisioning/EapCommon>26</Type>
      <VendorId xmlns=http://www.microsoft.com/provisioning/EapCommon>0</VendorId>
      <VendorType xmlns=http://www.microsoft.com/provisioning/EapCommon>0</VendorType>
      <AuthorId xmlns=http://www.microsoft.com/provisioning/EapCommon>0</AuthorId>
   </EapMethod>
   <Config xmlns=http://www.microsoft.com/provisioning/EapHostConfig>
      <Eap xmlns=http://www.microsoft.com/provisioning/BaseEapConnectionPropertiesV1>
         <Type>26</Type>
         <EapType xmlns=http://www.microsoft.com/provisioning/MsChapV2ConnectionPropertiesV1>
            <UseWinLogonCredentials>true</UseWinLogonCredentials>
         </EapType>
      </Eap>
   </Config>
</EapHostConfig>
            </Configuration>
         </Eap>
      </Authentication>
   </NativeProfile>
   <Route>
      <Address>10.0.1.0</Address>
      <PrefixSize>24</PrefixSize>
   </Route>
<RegisterDNS>true</RegisterDNS>
<DisableAdvancedOptionsEditButton>true</DisableAdvancedOptionsEditButton>
<DisableDisconnectButton>true</DisableDisconnectButton>
<DisableIKEv2Fragmentation>false</DisableIKEv2Fragmentation>
<IPv4InterfaceMetric>3</IPv4InterfaceMetric>
<NetworkOutageTime>0</NetworkOutageTime>
<UseRasCredentials>false</UseRasCredentials>
<PrivateNetwork>true</PrivateNetwork>
</VPNProfile>
You need to edit the following settings with your data:
- <DnsSuffix>kita.local</DnsSuffix>
- <TrustedNetworkDetection>kita.local</TrustedNetworkDetection>
- <Servers>vpn.uchilab.org</Servers>
- <Address>10.0.1.0</Address>
- <PrefixSize>24</PrefixSize>
If you have configured IKEv2 to use the Automatically use my Windows log-on name and password setting:
<UseWinLogonCredentials>true</UseWinLogonCredentials>
otherwise:
<UseWinLogonCredentials>false</UseWinLogonCredentials>
Open the Firebox AddVPN.ps1 file with Notepad and check its CryptographySuite settings and copy the settings to the ProfileXML_User.xml file
- <AuthenticationTransformConstants> GCMAES128</AuthenticationTransformConstants>
- <CipherTransformConstants> GCMAES128</CipherTransformConstants>
- <PfsGroup> PFS2048</PfsGroup>
- <DHGroup>Group14</DHGroup>
- <IntegrityCheckMethod>SHA256</IntegrityCheckMethod>
- <EncryptionMethod>AES256</EncryptionMethod>
There are many different settings you can configure. For the full explanation of all options, check the documentation and example files from these sources. These resources explain the remaining settings in more detail.
- Richard Hicks’ website and his ProfileXML_User.xml example
- MR T-Bone’s Always On VPN guide and his AoV-User-Tunnel.ps1 example
In the PowerShell v7 Terminal run the following command to add the Always on VPN profile to Windows.
New-AovpnConnection ProfileXML_User.xml – ProfileName “Always on VPN”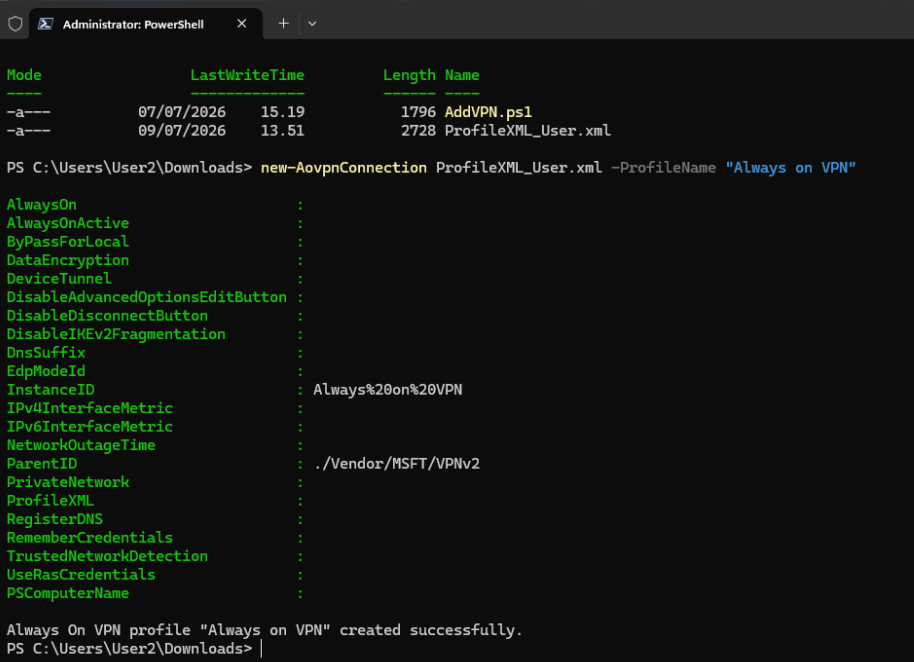
You should now have a IKEv2 Always on VPN on your Windows. Click connect and sign-in with the Username and Password. Test moving the Windows machine between your local network and an internet connection. The IKEv2 VPN should automatically disconnect when in your local network and automatically connect when outside the office with an internet connection.
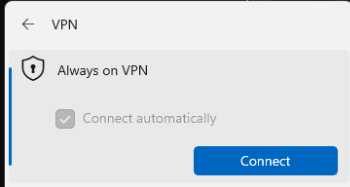
If the AOVPN profile doesn’t work, you can remove the Always on VPN profile with:
Remove-AovpnConnection ProfileName “Always on VPN”
Check and edit the ProfileXML_User.xml file and try again to add the Alway on VPN profile…
When your Always On VPN *.xml profile works correctly, you can start deploying it to the computers in your AD domain.
Install AOVPNTools on each computer
Use New-AovpnConnection to add the Always On VPN profile to the user’s machine.
Deploy a PowerShell script with Group Policy
Use a GPO startup script to run the PowerShell file and apply the XML configuration. (This method is a bit of a pain.)
Use the free open‑source Always On VPN DPC tool
However, DPC only supports certificate authentication, not mschapv2. And as mentioned earlier, Firebox IKEv2 does not support certificate authentication.
But you can still use DPC to distribute the ProfileXML_User.xml file.
To use DPC:
- Download the DPC client and install it on the user’s computer (for example, using GPO software deployment).
- Download the DPC ADMX templates and configure DPC settings through Group Policy.
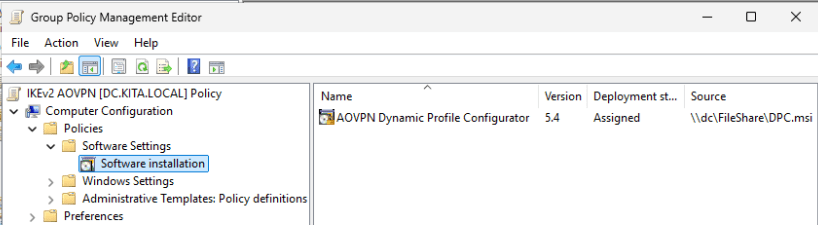
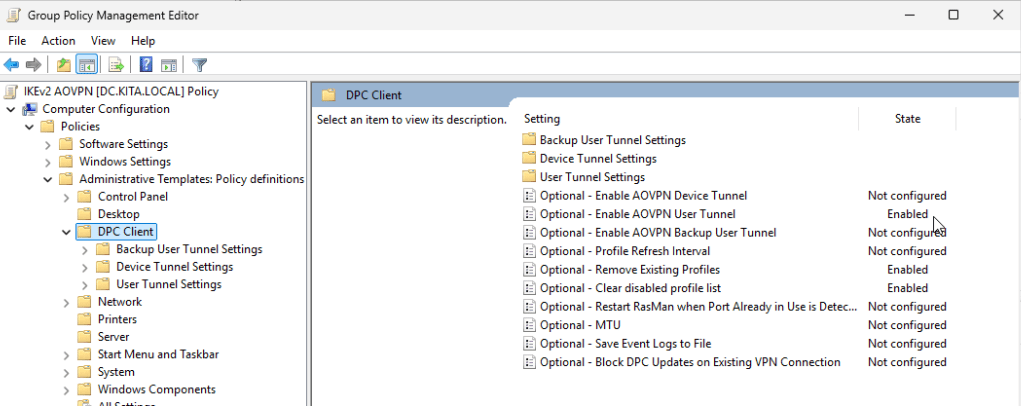
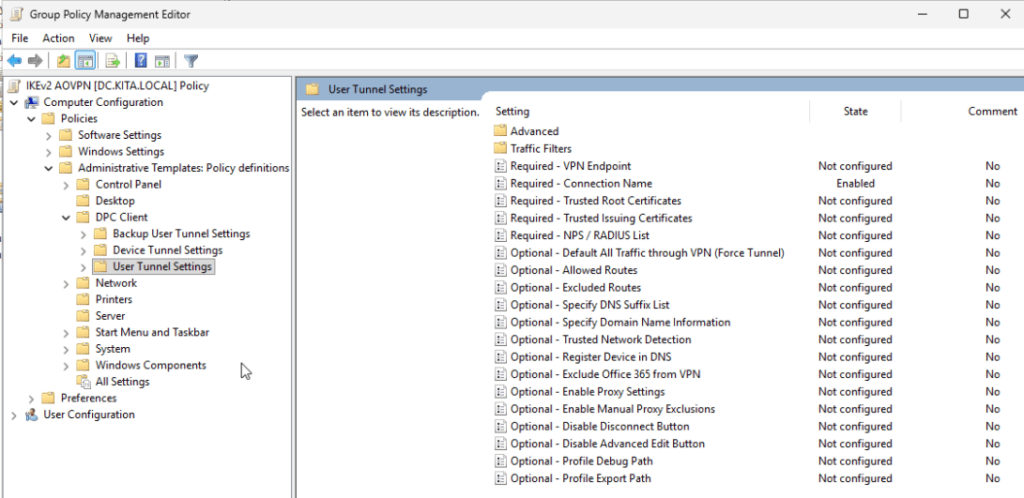
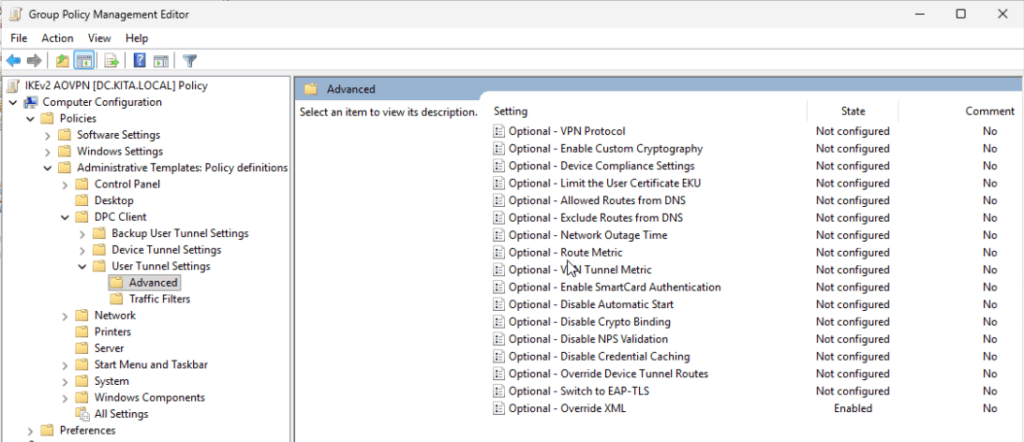
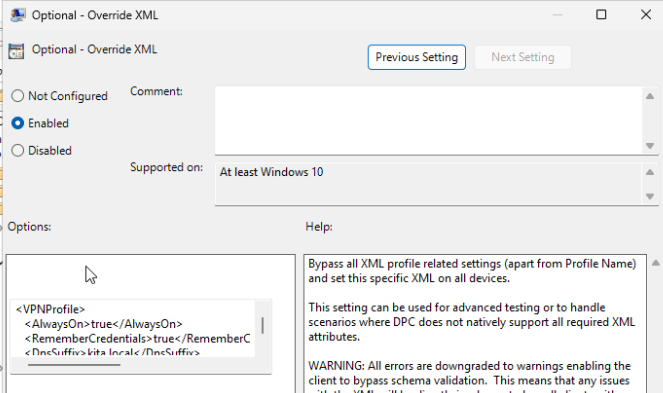
You can speed up how quickly DPC applies its configuration on a user’s computer by running these commands:
gpupdate /force
restart-service dpcservice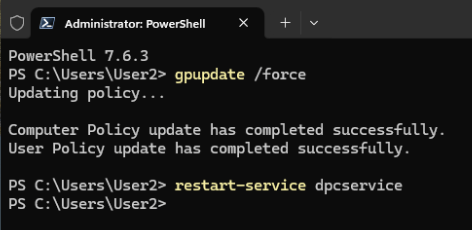
This forces the Group Policy update and restarts the DPC service so the new settings are applied immediately.